
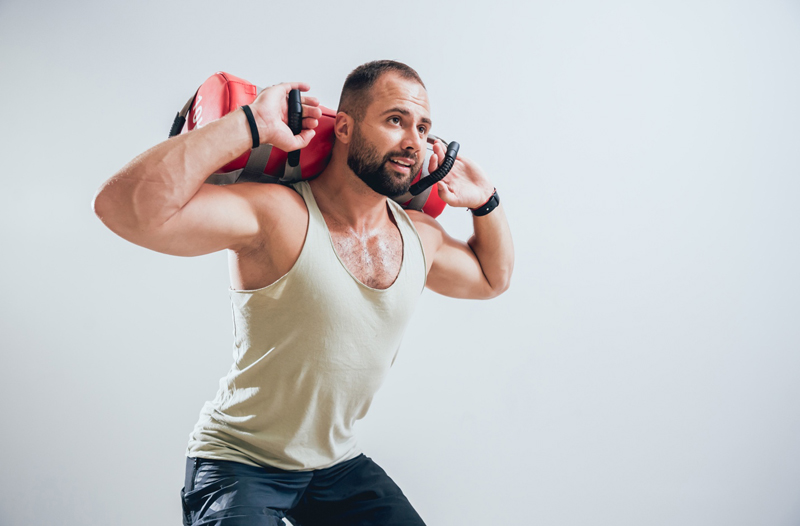
1. Sandbag Burpee
This exercise is a variant of the classic burpee but with extra added weight through the use of the sandbag. It combines several different exercises in one – you have squats, pushups and jumps. With this exercise, you train for strength, explosiveness and functionality. In it, you employ both the lower and the upper body muscles. It can be a great addition to all of your sandbag workouts.
- Firstly let me tell you that It’s a good idea to start with lighter weights. Also, before the exercise, always warm up well. Place the sandbag on the floor at shoulder height. Stand above it with your legs slightly wider than your pelvis, your feet parallel or with your toes slightly apart. Squat and grasp the sandbag with both hands.
- Stand In the starting position, with the arms stretched and the pelvis pulled back, with legs bent at the knees. Jump with both feet up and powerfully unfold in the hip joints so that the legs shoot back – as if trying to kick something behind you with both feet at the same time.
- Then land on your toes. Stretch the body so that from head to toe is in a line and stand in a high plank position. Do a pushup by pressing into the bag.
- Press the bag, then bounce with both feet at the same time, bend the hips and knees. Then land on your toes with a stride the width of your pelvis. Driving through your heels off the floor and jump up powerfully – as high as you can. After you came back, you have completed one repetition.
2. Good Mornings
The Good Morning is mainly used in building strength and power of the waist and buttocks. It also affects the development of these muscles, but it contributes to increasing muscle mass is limited.
- What is specific about this variation of the Good Morning is that the bag is placed on the fold of the arms, just above the forearm. Remember that your elbows should be levelled with your shoulders, with your palms facing you.
- Stand with your feet shoulder-width apart. Take and hold the bag as described. Keep your back fairly straight, with a slight bend at the waist. Bulge your chest. Look ahead. Tighten the abdomen and lean forward smoothly.
- The movement begins by bringing the pelvis back and continues by bending the torso, keeping the spine straight. Slightly bend your legs at the knees. The weight should be on the heels and the back of the feet. It should be emphasized – you bend only in the hip joints without bending the back. You bend until your body is parallel to the floor or as far as the back thigh muscles can stretch.
In the beginning, the exercise can be performed with a partial amplitude of 30-45 degrees while slowly descending lower and lower each time.
3.Backwards Lunges
In this lunge variation, the trainee takes a step back and kneels almost on his knees, balancing the body. This option is performed with a sandbag in front of the chest. Its variable centre of gravity makes the exercise more demanding and effective. The quadriceps are mainly loaded. The buttocks, back, calves, adductor muscles and back thigh muscles support the movement.
You can hold the bag in front of your chest in different ways. The most convenient is the so-called Zercher grip, in which the bag is on the folds of the elbows, and you press it with your forearms to your chest. The position of the bag will force you to work with the upright position. This allows the weight to “push” the body directly down rather than forward.
- Take the bag in front of your chest. Stand upright with a stride slightly wider than the thighs’ width, with the feet parallel to each other and the toes pointing forwards. Take a wide step back with one foot and rest your toes on the floor.
- Distribute the weight on both legs and slowly lower your body vertically. In doing so, the front foot’s knee must move above the foot and not protrude in front of the toes. Keep your back straight. Stop the descent just before the knee of the hind leg rests on the floor.
- Hold in the lower position for a second and stabilize your body. Then return to the starting position. This is done by first lifting yourself up. Then press with the foot of the front foot on the floor, transfer the body’s weight on it and return the hind leg to the starting position. Swap the leg for the next repetition.
4.Sandbag Glute Bridge
Another sandbag exercise, this variation of the bodyweight classic tightens and shapes the muscles of the buttocks, thighs and lower back. This variant of the gluteus bridge is performed with additional weight – a sandbag placed on the lower abdomen to increase the load.
- Lie on your back, bend your legs at the knees and place your feet firmly on the floor 15-20 cm from the pelvis at knee width. Keep your legs and knees together or slightly apart. This ensures an even distribution of the load on the gluteal muscles and those of the thighs’ back.
- The position of the feet should not change throughout the exercises. Place the sack on the lower abdomen above the hip joints and hold it in this position with your hands.
- On the exhale, raise your pelvis as high as possible. The effort is mainly on the muscles of the buttocks and back of the thighs. To a lesser extent, the muscles of the lower back are also involved. Hold at the top point for a second.
- Then inhale slowly lower your body to the starting position. The movement must be smooth and controlled. Aim to perform 3 sets of 10 – 12 repetitions.
Conclusion
Try these sandbags workouts as part of your workout routine and your will be surprised with the results. Let us know how you get on.
Comments
comments